
 This layout is Hybrid. Hybrid means that Digital Elements are printed on real paper and used as elements in traditional scrapbooking. I used my Epson 1400 large format printer to print the elements and then incorporate them into my layout.
All the digital Elements are freebies, downloaded from Creating Keepsakes or various blogs via Digifree. Digifree is a blog that searches out all the freebies each day and provides links to go get them. I visit every couple of days and scroll through to find things I really like. There is no way to download everything. The choice is too vast.
- The blue polka dot is by Jessica Sprague (JSpragueFlower_SpottyDots.jpg) from Flower Girl Mini-kit downloaded from Creating Keepsakes. I used the Stampin Up Scalloped border punch to punch the edges of the paper to create the 8"x 8" mat.
- The stripe border is MCO_Wonderful04.jpg. I printed both files with my Epson 1400 large format printer.
- The "forever cherished" digital stamp is by Feistuff (FEIstuff_dated_cherishedgr.png) downloaded as a freebie, from her blog. I used Photoshop Elements 6.0 to place it where I wanted it and printed it directly onto my Craft Cardstock from Hobby Lobby. I wrote in the date and Adler's name with my own handwriting.
- All items were distressed with Shabby Shutters Distress Ink by Ranger.
- I positioned the scalloped mat first.
- I placed the striped border on the background and then zigzag stitched the ribbon the ribbon onto the layout through all thicknesses.
- I created my journaling tag to be hidden under the mat. I used a shipping tag, distressed the edges with ink. A little tip for placing handwritten journaling is to do it lightly in pencil first to make sure you have enough room. Then go over it with a permanent ink. You can erase any pencil lines that show when you are finished.
- I placed the mat down with a few dabs of glue and then layed the journaling tag on top of it to mark placement lines for stitching. I straight stitched a pocket on the mat to hold the tag.
- I then sanded the edges of the picture to distress it and make it pop off the dark mat. I adhered it to the mat.
- I painted the chipboard swirls with Ranger's Paint Dabbers and placed them in the opposite sides of the picture.
- The title was cut with the Klick N Kut Element using Jester.ttf for the word Impish and Arial Bold for the word Grin. I rubbed Shabby Shutters paint over the letters to give them some depth.
I saw an altered picture frame on Two Peas that didn't have a backing in so that you could see the wall behind it. I thought it was a pretty cool idea. I love to work with Acrylic Albums, so I thought this was another way to take it a step farther. And I love the way the elements create shadows on the wall behind it to give it more depth.


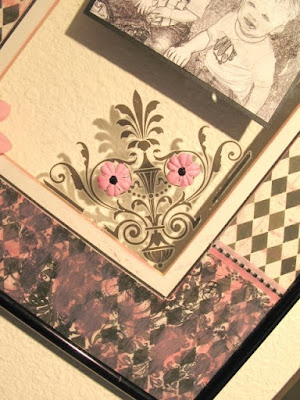

This particular frame and mat was one that had been hanging in my bedroom for years. The mat was gray and it had a black and white picture in it. It was time to give it a make over. I wanted to hang it in my studio, so it had to be pink and black.
- I covered the mat with Bo Bunny pattern paper. Since the frame is 12x16 the paper needed to be pieced. I covered seam with ribbon and stamped over the bottom with black ink and several different flourish stamps. I then "distressed" the whole mat with pink acylic paint.
- I "photoshopped" the picture by turning it to grayscale and appling a crayon filter to it. I then adjusted the levels to bring out the detail lines of the boys faces. After matting the picture on black cardstock, I used Creative Imaginations Scrappers Spray on the FRONT of the picture and adhered it to the inside of the glass.
- I used Marah Johnson Swatch Book Impress-ons by Creative Imaginations on the inside of the glass.
- On the outside of the glass I adhered two pink Prima flowers with black Stickles centers over the rubon with glue dots.
- To finish off the frame I layered large Heidi Swapp flowers with a Bazzil Big Brad and placed it in the corner of the frame with a glue dot.

1 comment:
oh my goodness, adler looks so big in that first "project". so handsome. i know you're a proud gammi. :)
Post a Comment