Friday, June 29, 2012

A Whole Lot of Creativity Goin' On......

I love to host.  Preparing and sharing my home with friends.
I love to hang out with Creative People and soak in the inspiration they have to offer.
I love to Create.

Today I got to do all three.  What fun it was.
The Texana Designs Team came for a day of FUN!!!!  We visited, ate, and created.  We also planned our next get together.


I watched and listened and learned some great techniques.  And I got to create a little.
A simple card with an important message.  The Texana Designs Bluebonnet Stamp was colored with Tim Holtz new distress markers.  The sentiment is one of the NEW RELEASES.

Supply list:
Texana Designs Stamps:
WF001-Bluebonnet (Framed)
TD059—Caring thoughts
Craft Cardstock 
Umber Cardstock by the Paper Company
7 gypsies Patterned Paper from the Venice collection 6x6 paper pad
Tim Holtz Distress Markers - Broken China, Faded Jeans, Peeled Paint, Vintage Photo.
Say it with Crystals by Prima
May Arts Ribbon
Pin It

Sunday, June 24, 2012

Caring Thoughts.......Encouragement Reminder

Have you ever had a friend going through a rough time?

  You wanted to encourage somebody and remind them in a concrete way that you were thinking of them without constantly calling and checking on them or bombarding them with cards or emails.  What about making a little plaque they could hang on their refrigerator where they could be reminded that someone cares.

I started with a blank 5x7 canvas.  I painted it with green and yellow acrylic paint.

I used my heat gun to speed up the drying process.

I used the end cap from a Zig marker dipped in yellow paint to add some texture to the background.

I took a piece of twine and dipped it in pink acrylic paint.

And dragged it gently across the canvas to add more texture.

The finished background looked like this.

After stamping the Hummingbird image onto the lower left corner of the background, I started preparing watercolor paper using the same paint I used to paint the background for paper piecing.

I painted a splotch of pink for the flower. 

Some yellow for the stamen.

And green for the hummingbird.

After stamping the image into each color swatch, I cut the parts out and glued them to the canvas over the original image.

I then found a scrap of patterned paper that matched my project and stamped my butterfly THREE times onto the paper.

I fussy cut the butterflies out and folded them in half.

I glued the butterflies together to create the illusion of the butterfly's wings fluttering. 

I took a blank wooden tag and color washed it using watered down acrylic paint. 
'

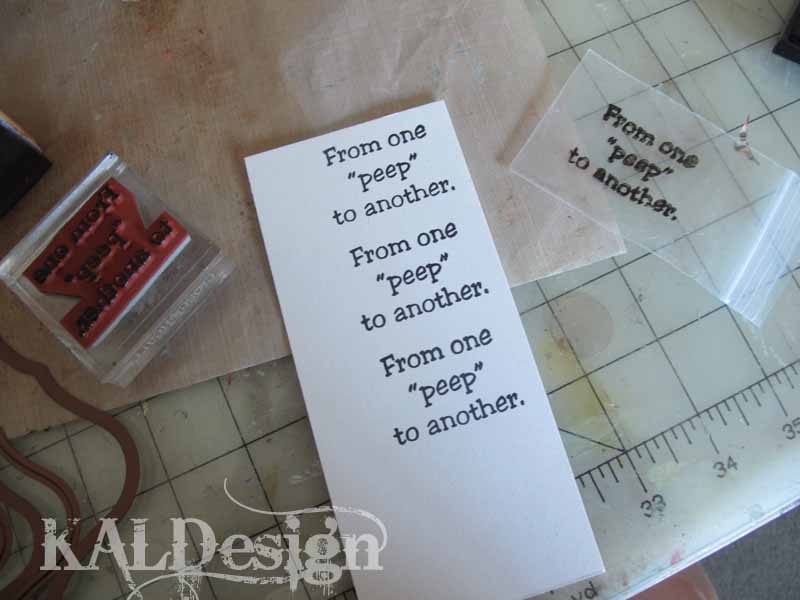
I stamped my sentiment onto the wooden tag and threaded a piece of ribbon through the hole of the tag.
I dry-brushed a little pink paint onto the edges of the tag to give it the distressed look. 

 I used some thick glue dots to attach the tag to the canvas. 

Last but not least I glued a magnet to the back of the canvas so it could be hung on the refrigerator.

 The results - A pretty reminder that someone cares.


Supplies Used:

Texana Designs Stamps: 80815 Hummingbird/Hibiscus, 80803m Butterfly (mini), and TD059 Caring thoughts
5x7 blank canvas
Green, Yellow, and Pink Acrylic Paint
Scrap of Patterned  Paper
Scrap of water color paper
Naked wooden tag
Small piece of ribbon
Archival Ink by Ranger
Small Magnet

Pin It

Thursday, June 21, 2012

I LOVE PINTEREST!!!!


I have always enjoyed looking at pretty things.
I have always liked getting inspiration from the internet.
I have always loved making pretty things.

Since I discovered PINTEREST it seems that it has become easier to do ALL three.

I spend a little time.....just a few minutes here and there checking out Pins that others have posted. I also spend about 1/2 hour reading blogs I follow and if I see something I really like, I pin it to my Pinterest board.

Below is the result.....An organized place to find things I love, Inspiration to CREATE, and instructions how to do it.


BUT THIS MORNING WHEN I LOGGED ON - THIS IS WHAT I FOUND.....

OH MY GOODNESS.....APPARENTLY OTHERS LIKE WHAT I PIN ALSO.

I AM SO HONORED!!!!!
Pin It

Sunday, June 17, 2012

Chicks Rule!

A simple card makes a simple statement.
Chicks Rule!


I used the chicken wire template and a Ranger Ink Blending Tool to apply the Black Soot distress ink to create the background for the card.
I then stamped the Chicken on the card background and also on two different patterned papers.
I fussy cut the chicken parts out of the patterned papers and glued them to the image stamped on the card.
I stamped the NEW!!! Texana Designs Sentiment onto the thought bubble and adhered it with my home made pop dots.


Texana Designs JB004 Chicken 1
Texana Designs TD057—Chicks Rule!
Kraft Card Stock Card Base 5 1/2 x 4 1/4
The Crafter's Workshop Mini Chicken Wire Template
Ranger Distress Ink - Black Soot
VersaFine Ink - Black Onyx
My Minds Eye Patterned Paper scraps from the Lost and Found Union Square Collection
Silhouette Cutting File - 3_thought_bubbles_C00387_20509 Pin It

Tuesday, June 12, 2012

It's Fiesta Time.......

I have been invited to be a guest designer for Catered Crop.  What an amazing opportunity!!!  I have admired Linda's blog and her ART for a long time.  Until recently I admired from afar, because I thought I could never measure up.  But then I thought why not?  I began following some of her design recipes and linking up with the results.  Sunday morning when I checked to see what the next recipe was.....there it was!!!  My name among those invited to join the design team with a card for the next recipe.  WOW!!! 

Now I can proudly display this button!!!

Catered Crop

The recipe for this week is Buntings and Banners.
I checked out Pinterest for inspiration and found this picture.  I love the little banner on this cake.  I was thinking PARTY when I designed my card and it was perfect.  


I love this Texana Designs Chili Pepper Stamp.  It is so FESTIVE with all the swirls.  It is perfect for a FIESTA.   

To create my bunting, I used this Martha Stewart Border Punch and a strip of Vellum

 Then I cut the border into strips that became my baby bunting.  So tiny and delicate.

I ran the strips through my sewing machine to joint them together.

Once I joined them together I trimmed the top off the strips.

I stamped the Chili Peppers 3 times

And cut them out to form a border. 

 I colored them with Watercolor Pencils and  embellished them with Stickles to add some Festive Party BLING. 

I finished out the card by writing F I E S T A on the bunting with Stickles.

Are you ready for a PARTY?  

Supply List
Texana Designs 100708S Chili Pepper (small) Stamp
Card stock in Red, Green and Yellow
1/8 inch wide yellow ribbon for bows
Paper Studio Little Stars Embossing Folder
Stickles 
Water Color Pencils
Pin It

Sunday, June 10, 2012

Stand by......Catered Crop Guest Designer

Sunday Mornings one of my first places to visit on the WWW is Linda McClain's Catered Crop, because she always post a new Recipe Swap Idea.  This morning I was reading it and there was MY NAME as one who is invited to be a GUEST CHEF for the next Round.  What an Honor this is!!!!  Linda is one of the most talented card designers I know and for her to pick my card is quite an honor.  So I proudly display this  WINNING RECIPE BUTTON!!!
Catered Crop

Last week I linked up with Catered Crop's  Felt with the Heart Recipe Swap.

I created this card by stamping on Felt and "paper piecing" the flower.  You can see my blog post and how I did it HERE.

STAY TUNED my my Card!!!!  You will be able to see it next Sunday on Catered Crop.
Pin It

Thursday, June 07, 2012

Something NEW

I am getting ready to create another wedding dress this summer.  This one will be made using the lace from the mother of the bride's wedding dress.  It will be special to both the mom and the bride and will create some sentimental memories for the family. I have been loving the look of vintage mixed media for quite awhile.  I have found a lot of inspiration on Pinterest  Rebecca Sower has an incredible style. and in particular Master Pinner Marja Schwedler.Lisa Pace's Creations also inspire me.
Having created Bridal Dresses for over 15 yrs has left me with lots of little pieces of silk and lace.  I have wanted to do something with it for a long time.  A couple of days ago, I grabbed a handful of lace remnants and a piece of silk and started arranging.  It was fun playing with the lace again.  It was fun planning where I could add some pearls and create a piece of art.

 I wanted it to not only be vintage beautiful, but also useful.  I decided to make a little pouch perfect for jewelry or for a brides emergency kit.  This little pouch is 5 inches wide by 6 inches deep.  Perfect for holding storing your bridal jewelry or garter after the wedding, or it could hold  a few band-aids, a small package of aspirin, some safety pins, a needle and thread, a small emery board.


Pin It

Monday, June 04, 2012

My Blog has a NEW LOOK

I saw a photography blog where the pictures just popped off the page.  It was because the background was WHITE.  I love the clean look.  Since most of my pictures are colorful, I decided to try it out.....so here it is.
CLEAN and SIMPLE.  Tell me what you think, please. Pin It

Sunday, June 03, 2012

New Hats and Day 3 - #30DaysofCreativity

I am hoping for more creativity since the day is only half over, but this is my creation for today. I finished my cute little own hat.  I crocheted for many years when my kids were little.  In the 90's I started designing wedding dresses and the crocheting fell by the wayside.  I rediscovered it this year when I started making some cute character hats for my grandsons.  I am really enjoying creating these and plan to restock my ETSY store very soon.

Newborn Elf Hat
Newborn Pink flower hat comes with removeable flowers
Turquoise flower hat comes with removeable flowers.  


Pin It

Saturday, June 02, 2012

30 Days of Creativity - Day 2

Or what do you do when you don't leave enough room for the sentiment stamp?

I am participating for the second year in 30 Days of Creativity.  This is the 3rd year for 30 days, but I just found out about it last year.  You can CLICK HERE to see my 2011 creations.
This year I am going to attempt to make it another 30 days straight of being creative.

Yesterday, June 1, I still had 2 little munchkins here so I knew not much creativity would be going on.  I made a yarn flower before they got here with a paper loom I made myself.  I used 2 card stock circles glued together and some straight pins to make the loom.  CLICK HERE to find a picture of my little flower on my Pinterest Board.

This morning my sweetheart and I did alot of work around the house so I finally got a chance to create a little this afternoon.  I have been waiting to use my little bird stamps by Texana Designs so I decided today would be the day.  
I chose these papers by Daisy D 
But then I realized I didn't leave enough room for the sentiment that I wanted to use.  I intended it to be above the little birds head.  I didn't want to take a chance of ruining my work.
I stamped the sentiment on a little plastic bag.
And laid it over the card where I wanted it to be.  Nope it didn't fit.
 Now what was I going to do.  I thought about cutting my stamp apart so I could stamp in different places, but I knew that if I did this it would never be the same again. 
It was a 3 line sentiment so I stamped it 3 times on a piece of white card stock.
I then cut the sentiments apart using one line from each stamping, giving adequate spacing around each line
Perfect.  I had my sentiment on the front of the card.
To finish the card off I used some Stickles to highlight the tail feathers and beaks
and added a heart shaped gem on the border strip.
And here is the finished card!!!!
Another day of Creativity complete.
Supplies used:
Texana Designs Stamps can be found HERE
Pin It